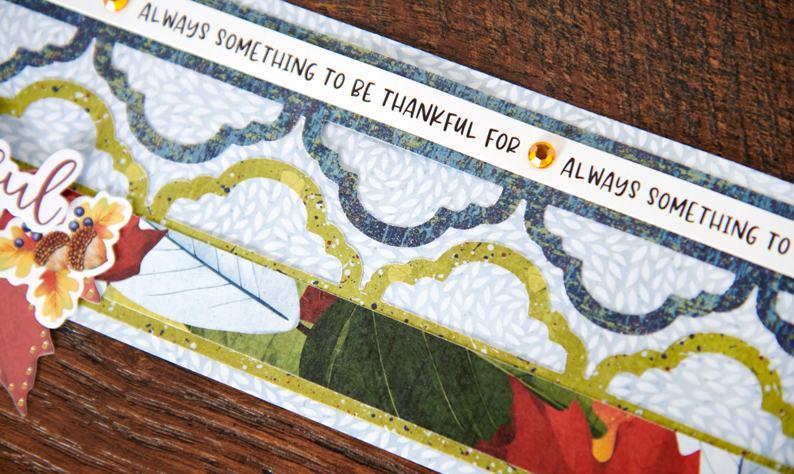

Thankful Border

Step 1: Cut a 12″ x 3-1/4″ strip of light blue tonal paper for the base.
Step 2: Line a piece of navy designer paper up at an inside mark of the Arch Border Frame Punch. Punch a border and trim out to 12″ x 1-1/2″. Adhere near the top of the base and add a border sticker, as shown.


Step 3: Line a piece of green designer paper up at an outside mark of the Arch Border Frame Punch. Punch a border and trim out to 12″ x 1-3/4″. Adhere near the bottom of the base and mount a 12″ x 3/4″ strip of leaves designer paper. (Tip: Save the punched out “tab” pieces to use to make the Falling for You Border.)
Step 4: Add gems, stickers and embellishments.
Falling for You Border

Step 1: Line a piece of light blue plaid tonal paper up at an outside mark of the Arch Border Frame Punch. Punch a border, trim off the partial arches on the ends, and trim out to 12″ x 3-1/8″ using the 12-inch Trimmer with the Scallop Blade. This is the base.
Step 2: Line a piece of gold tonal paper up at an inside mark of the Arch Border Frame Punch. Punch a border and trim out to 12″ x 2-7/8″ using the 12-inch Trimmer with the Straight Blade. Adhere this piece on the base. Punch arch borders with navy, green and orange designer papers to obtain small pieces to place in the arch sections of the gold piece, as shown.
Step 3: Cut a 12″ x 1-3/4″ piece of white striped designer paper. Adhere to the base and top with a 12″ x 1-1/4″ strip of navy plaid tonal paper. Mount a leaves border sticker on top.
Step 4: Add embellishments and stickers.
Apple of My Eye Border

Step 1: Cut a 12″ x 3-3/8″ piece of striped designer paper for the base. Cut an 11-1/4″ x 2-5/8″ strip of crimson designer paper and mount on top of the base. Cut an 11″ x 2-3/8″ strip of dots designer paper; concave the corners and adhere to the crimson piece as shown.


Step 2: Cut 4″ x 2″ pieces of navy, crimson and dark green designer papers. Punch both short ends of each piece using the aArch Border Frame Punch, aligning the 2″ end between the inside marks of the punch. Link the pieces together and adhere to the middle of the border. Cut three 1-5/8″ squares from scrap papers and mount in the middle of the arch pieces as shown.
Step 3: Add stickers and gems.
Full of Thanks Card

Step 1: Use a card from the Blank Card Kit for your base. (Or cut an 8-1/2″ x 5-1/2″ piece of White Cardstock. Using the 12-inch Trimmer with the Scoring Blade, score along the long edge at 4-1/4″ and fold in half.)
Step 2: Cut a 5-1/2″ x 4-1/4″ piece of branches designer paper and mount it on the front of the card. Cut a 5″ x 3-3/4″ piece of gold tonal paper. Concave the corners and mount on the card as shown.
Step 3: Cut a 4-3/16″ x 4-3/16″ piece of navy designer paper. Align one side in the middle of the Arch Border Frame Punch so the ends reach the ends of the outside marks on the punch. Punch and rotate to the next side. Repeat until all four sides are punched. Trim off the corner squares. Cut a 4″ x 4″ piece of light blue designer paper. Align in the middle of the punch and punch as before. Mount the smaller light blue arch shape on top of the navy arch shape and adhere on the middle of the card.
Step 4: Thread a tiny navy paper strip through the holes of the “Full of thanks” foiled embellishment. Mount on the middle square of the arch shape. Add gems and stickers.