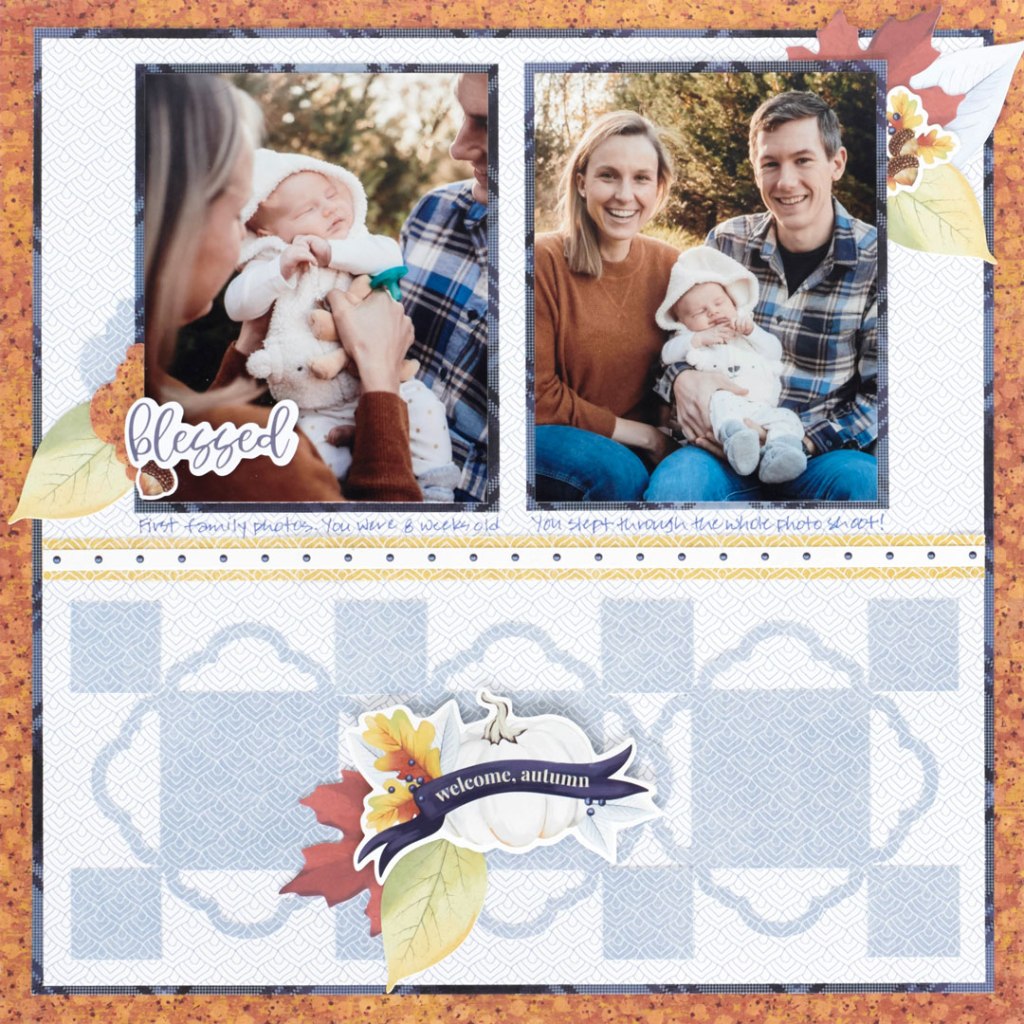
Step 1: Use a piece of orange designer paper as the base for this layout.
Step 2: Cut an 11-1/4″ x 11-1/4″ piece of navy plaid tonal paper and adhere to the base. (Tip: To save paper, cut two 4-1/4″ x 5-1/4″ photo mats from the middle of this paper for Step 3.) Cut a white leaf tips tonal paper to 11″ x 11″ and mount on top of the navy piece.
Step 3: Mount two 4″ x 5″ photos on two 4-1/4″ x 5-1/4″ pieces of navy plaid tonal paper. Adhere to the top half of the layout.
Step 4: Cut three 4-3/16″ x 4-3/16″ pieces of light blue leaf tips tonal paper. With each, align one side in the middle of the Arch Border Frame Punch so that the ends reach the ends of the outside marks on the punch. Punch and rotate to the next side. Repeat til all four sides are punched. The corner squares should still be intact. Repeat with the other two 4-1/8″ square pieces. Mount on the lower half of the layout, overlapping the middle corner squares as shown.
Step 5: Cut an 11″ x 1/2″ strip of gold leaf tips tonal paper. Mount a border sticker on top, trim to fit and adhere to the middle of the layout.
Step 6: Add stickers and foiled embellishments. Journal as desired.
Visit this CM Blog for a full list of products and tools needed to recreate this layout.